How to: Make the Kindle a more personal gift
12 Apr 2015

Something that I always thought was interesting about the Kindle was the unboxing. Instead of a blank-screened device waiting to be turned on, the Kindle arrives with its setup information already on the screen. Displaying static images doesn’t require any power on an e-ink screen, so having it display something when you first open it is a nice flourish that puts the screen to good use.

It also gave me an idea: Kindles make good gifts, so your own message displayed on the screen when the recipient unboxes it would be a nice personal touch.

As we’ll need to open the Kindle box to do this, you might as well charge it and load it up with a few books while you’re in there.

Displaying your own message on the screen is straightforward, as the Kindle can display PDF documents. You can download a copy of my template for Word (pictured above), or a version for Pages. Personalise as appropriate and export as a PDF. To get it on there, connect the Kindle to your laptop and copy the file across into the documents folder. Once you’ve unplugged the Kindle, your file will appear in the book list.

The issue now is that after a couple of minutes, the screensaver will come on. The lucky recipient will see your exquisite message… but only after unlocking the Kindle. That’s not what we came here for. Handily, disabling the screensaver is a minor tweak that doesn’t require you to jailbreak or do anything technical - in fact, it’s a single command. Open the search box, type in ~ds and hit enter.

You can check it’s worked by pressing the power button - it shouldn’t do anything. To get out of this mode and re-enable the screensaver you need to restart the Kindle, either by holding the power button or by opening the menu from the settings screen and tapping restart.

Voilla! If you’re going to store the Kindle for more than a few hours, you’ll want to turn the backlight off so that the battery doesn’t run down. If you’re giving it immediately, then a Kindle that’s glowing when the box is opened is definitely a feature.

If this has inspired you to give someone a Kindle as a gift, it’d be awesome if you bought it using my Amazon referral link.

Setup guide - Honeywell Total Connect Comfort + Cacti
03 Oct 2014
Download all the scripts and templates you need

When you’re using templates, Cacti is actually quite easy to configure. If you get into trouble you may find Cacti’s documentation on setting up data input helpful.

If you can, install Cacti via your distribution’s package manager and it’ll do some of the setup for you. Follow the Cacti docs to get it set up the rest of the way. You may also need to install mysql-server separately.

Then we need to set up the data grabbing script by copying it into place:

mkdir /var/lib/cacti/scripts/TotalConnectComfort
cp -r Device/ /var/lib/cacti/scripts/TotalConnectComfort
cp -r cacti-scripts/temperature.pl /var/lib/cacti/scripts/TotalConnectComfort

Note - the directories will be different in other OSes - on Ubuntu it'll be something along the lines of /var/lib/cacti/something/scripts

If you’re copying the Device::TotalConnectComfort module from source (rather than installing from CPAN), you’ll also need to install its dependencies. Install gcc and openssl-devel/libssl-dev using your package manager, then install cpanm and necessary modules with:

curl -L http://cpanmin.us | perl - --sudo App::cpanminus
cpanm JSON JSON::XS LWP::UserAgent LWP::Protocol::https

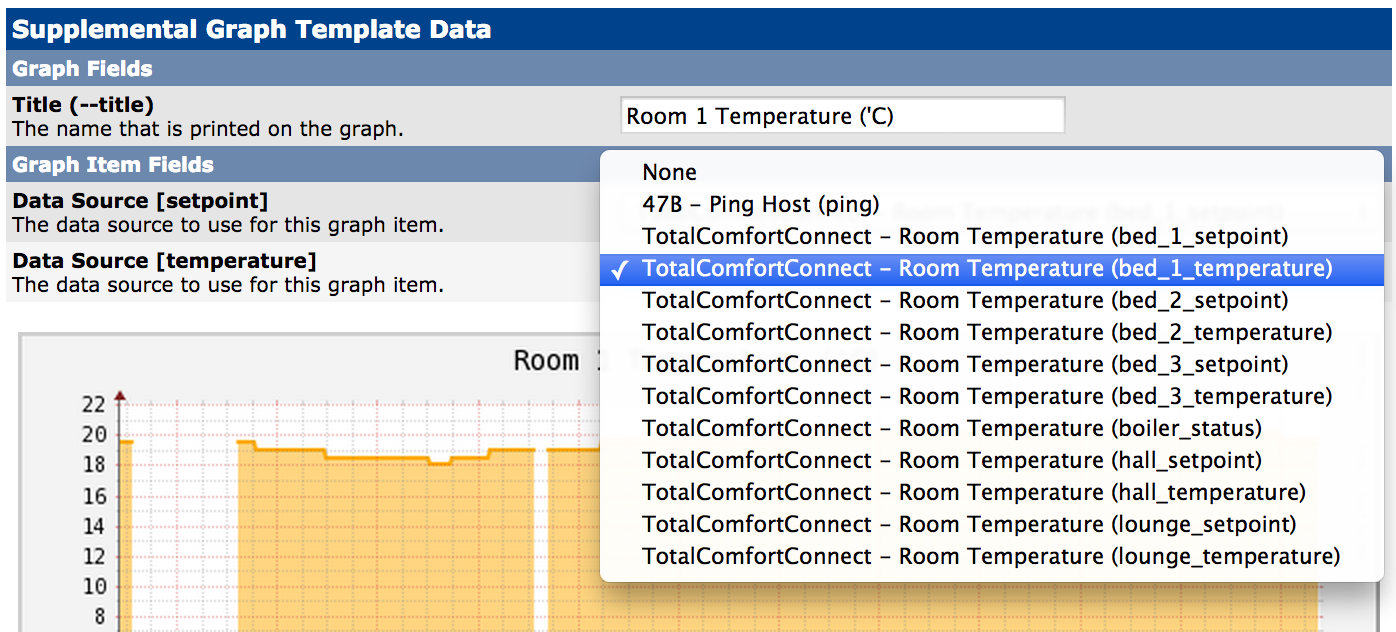
Ok, we’ve done all the grunt work. Now we need to make the pretty graphs. Import all four templates into Cacti via “Import Templates” (make sure you choose to “Use custom RRA settings from the template”). You’ll want to customise the Data Input Method and Data Template that they match the room names in your home.

Then finally, you can go to New Graphs and start setting up graphs. For that graphs that are per-room, you should edit them by going to Graph Management so that the data sources match the rooms.

After a few minutes of gather data, you should have some cool graphs!

You also get a neat historical view.

Mind the gap - we had a few network issues!
Temperature logging with Honeywell Total Connect Comfort
02 Oct 2014

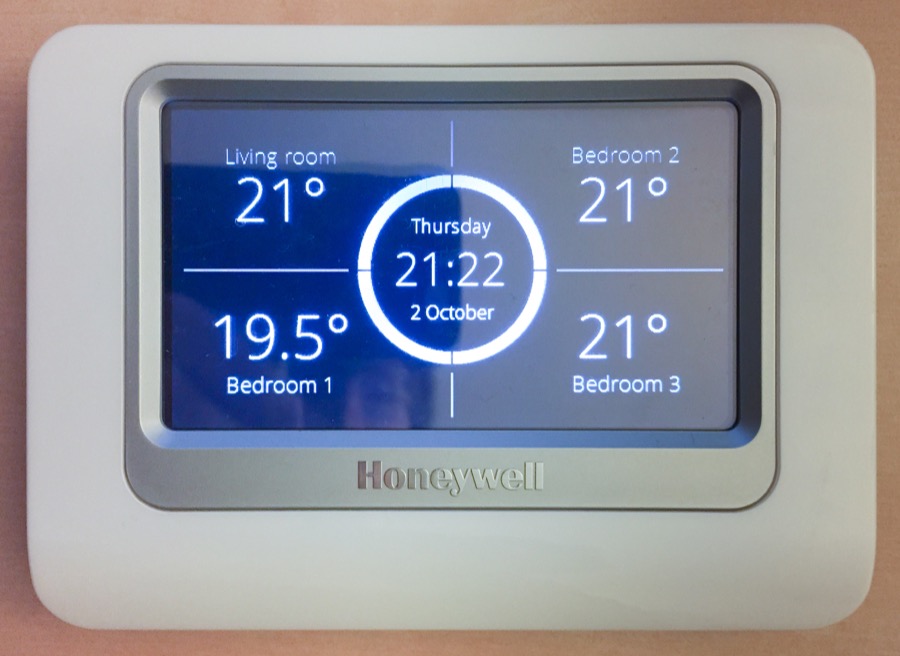
The latest foray our house has made into thing that are (unnecessarily) connected to the internet, also known as the Internet of Things, is the Honeywell Total Connect Comfort.

It’s controls your central heating with electronic valves on each radiator, which each talk wirelessly to a base unit. Each valve has a thermometer, which means that every room can be set to a different temperature, and the system can be smart and learn how fast each room warms up.

The intelligent per-room monitoring is the useful part of the system, and the part that will actually save you money. As it is with the Internet of Things though, if it can have an iPhone app… well, let’s just say you can change the temperature of your bathroom while sitting on a beach if your book isn’t holding your attention.

Home automation like this has an interesting future. Apple is getting big on it with HomeKit in every iPhone, which at some point will presumably allow you to voice control your heating through Siri. It does bring interesting questions about longevity though. How old are the standard non-Internet connected valves on your radiators? And what do you think the lifespan of the Honeywell system is? Even if it lasts past a decade, will the servers that allow iPhone control be around then? Will we even have iPhones?

Thoughts on the future of home automation aside, one aspect I find sorely lacking is any kind of logging or historical view. The thought of all that data going to waste while I am in a position to do something about it is nigh unbearable. Who doesn’t want to see the temperature in their house over the last year (or five)?

With slightly apprehensive thoughts of taking a soldering iron to the base unit, I took a look at how the iPhone app works. Thankfully it uses a nice JSON API to talk to Honeywell’s servers, which makes getting at the data a whole lot easier. There’s a slight latency in the API that makes me think it’s actually just proxying a connection to the hub in your house. Though I have no evidence to back me up, I think this is pretty likely. It makes the servers dirt cheap to run (and customers will expect them to run indefinitely), and partly explain why there’s no historical data.

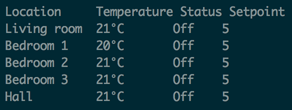
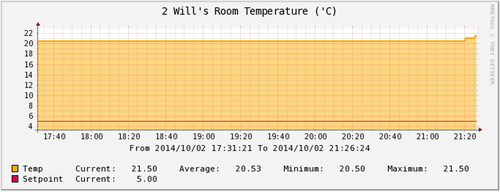
Given a nice API to talk to, I wrote a Perl wrapper to get temperatures from it. Once in posession of the data, the next part is graphing it. I used Cacti for this and I’ve included a script that outputs in a Cacti-readable format, along with several templates. Download the code!

The output of one of the included test scripts

As Cacti isn’t very beginner-friendly, I’ve written a setup guide that should end up getting you some awesome graphs like these:

HomeKit logo © Apple Inc.
iOS - what happens in the background?
04 Apr 2014

One part of Android that I’ve always thought is missing from iOS is good battery monitoring. Yeah, partly I just like knowing what’s going on, but it also gives you some visibility into battery problems. Phones have small batteries, so they get away with an all-day battery life because most of the time they’re idle and almost everything is off. The flip side is that unlike a laptop, a wedged process running in the background means serious battery drain problems.

To say Android is better equipped here would be an understatement

This problem is dodged by the system being agressive about what can run in the background, and when. But, it can still surprise you - it used to be that if you installed the Skype app, it sat in the background and chewed on your battery 1. Not to mention that with each iOS release, apps have more licence to run in the background.

What doesn’t seem to be well known is that there’s a way to do this without jailbreaking, using Instruments. Prerequisites are Xcode (and a Mac). You need to connect your device with a cable then set it up to work with Instruments, which you do just by opening Xcode with your phone connected 2.

In Instruments select iOS in the left panel, and the Energy Diagnostics template. To see what’s happening on your phone, hit record. In addition to the standard tools - CPU usage, Network activity - you can see when apps enter and exit running states via the flags at the top of the timeline. For example, Weather wakes up for a few seconds every time you unlock the phone.

More useful than just showing data when you’re connected to your laptop is that you can record diagnostics, and later review them in Instruments. Setting your phone up to work with Instruments adds a Developer menu item in Settings. To view the data, reconnect your phone then go to File > Import Logged Data from Device in Instruments.

  1. This was due to Skype’s decentralised architecture. See this email written by Skype’s Princial Architect and search for “hand warmer”.

  2. If you’re seeing this warning in Instruments, that’s probably the issue. The Developer-ness persists until you restart your phone.

USB Battery Packs
04 Oct 2013

Let’s talk USB battery packs. Essentially, you’ve got a lithium ion battery hooked up to a USB port. This is awesome because USB charging is pretty much ubiquitous, and for everything that does charge over it, you never need to worry about running out of battery again.

Batteries are always too small. The one-device trend doesn’t help, with phones replacing multiple gadgets which had their own batteries - if your camera’s battery ran out, you should still make phone calls. While the convenience of the consolidation far outweighs the problems, phone batteries are just not big enough. They’re getting better, more due to reductions in chipset power consumption than better batteries, but a brand new iOS or Android phone still won’t last a full day of GPS, gaming and photo taking.

As a result, a USB port attached to a big battery is remarkably useful, both for a long day or when you’re away from a wall socket for multiple days. Surprisingly, they’re also really convenient when you want to use your phone around the house while it’s charging.

Everything charges over USB

There are a load of different models out there, but I’m not going to recommend one or another. The only real design consideration you should make is to get one can be charged over micro-USB, saving the need for a propriatory cable. If you have a newer iPhone, a micro-USB lightning adaptor is useful as you can charge pretty much anything with the one cable.

The only real decision is how big. They’re usually rated in milliampere-hours (mAh). To give you a rough idea, an iPhone 5 has a 1,440mAh battery and a Nexus 4 sits at 2,000mAh 1. To get a rough measure of how many charges you’ll get, divide the capacity by your phone’s battery size and multiply by 0.7 2. From this, a 6,000mAh pack will charge an iPhone 5 slightly under 3 times.

The size and weight scales fairly linearly with capacity, so a 10,000mAh pack weighs about twice as much a 5,000mAh one. I’ve played with a few, and I think that 5,000mAh is the sweet spot for most people. They’re about the same size and shape as a smartphone, and although smaller ones are more pocketable, I wouldn’t carry one without a bag where the minor additional weight isn’t going to bother me. A lot of newer models are pushing 10,000mAh. Althought they’ll give about 6 charges, they weight in at about 300g which is pretty meaty. If you need something to keep your phone juiced for 7+ days, or are charging multiple phones, you probably known who you are - otherwise go for a 5k pack. Unless of course you’re not looking to charge a phone, which leads to my next point.

Essentially, the iPad is an iPhone strapped to a big battery and a big screen. And yeah, the reason it needs the big battery is the big screen. The problem with charging an iPad 3 from a pack is exactly how big this battery is. The iPad 4 clocks in at 11,560mAh - if you have a 10,000mAh pack, you might get 2/3 of a charge out of it if you’re lucky. Smaller tablets like the Nexus 7 (3950mAh) or iPad min (4440mAh) do rather better, nailing a couple of charges.

That’s about it. Don’t worry about leaving navigation running in the background.

  1. Astute readers will note that current phone batteries are 3.8V while battery packs are 3.7V, so watt-hours would be a better measure. I don’t make the rules.

  2. (Surprisingly accurate) fudge factor. The batteries are usually 3.7V, which has to be stepped up to 5V for USB charging, which is then stepped down by the phone. This gives an efficiency of something like 70%-80%.

  3. iPad 3 or later. Prior to that the batteries were fairly reasonably sized, but the introduction of the retina screen forced them to almost double the battery capacity to keep battery life the same.

Gromit Unleashed in GPX format
02 Jul 2013

If you’re in Bristol then you’ll have noticed a few of the Gromits that arrived on July 1st. If you have an iPhone or Android device then you should definitely download the app which has a map with all 80 of them.

If you have a GPS device, or prefer a GPS app, then I’ve created a .GPX file with the location and info for each Gromit. You can download it here. If you like it, then please consider donating to the Wallace & Gromit Grand Appeal.

For those who are interested, the iPhone app bundle contains a JSON file which holds data about each Gromit. I wrote a quick Perl script to extract this data and output it in GPX form. You can grab this script from GitHub (link coming soon).

Sync your Lightroom photos to iOS with iCloud Photo Stream
16 Jun 2013

Photo Stream is a neat iOS feature. Every photo you take with your phone just appears on your computer.

You can also use it to get photos from an actual camera onto your devices - it’s handy for flicking through pictures on an iPhone, and photos look really awesome on an iPad with a retina display. If you use iPhoto to manage your photos, this all happens automatically - but what about if you use Lightroom? Here’s how I do it.

Windows

You’ll need to install the iCloud Control Panel. Once you do, you’ll have a ‘Photo Stream’ folder in My Photos, and anything that gets dropped in there is uploaded.

All you need to do in Lightroom is create an export preset that exports your photos as JPGs to this folder, and they’ll show up on your other devices. Simple!

OS X

Not quite so simple.

As with Windows, we want an export preset in Lightroom that exports JPGs to a folder - this time though, we don’t care where it puts then.

Lightroom lets you run a program after the export, in the “Post-Processing” step. To get our pictures into Photo Stream, I use an Automator script. Open Automator, and enter the following steps:

This script will import your photos into iPhoto, where they’ll be uploaded to your Photo Stream and appear on your devices. The Photo Stream agent uploads even while iPhoto is closed, so there’s no need to keep it open.

You can also find the source for the Automator script on my github page.

unRAID on a Microserver
15 Jun 2013

I have an HP N40L MicroServer, and for a while I’ve been looking at ways of turning it into a network storage device with some disk redundancy. There are a couple of solutions for this which are usually suggested:

  • RAID 5 isn’t a good fit for home use. As well as requiring additional hardware, if something goes wrong the chance of losing everything is too high for my liking.
  • ZFS is promising, but its lack of Linux support means the best way to get it is FreeNAS - it’s good, but I couldn’t get Wake on LAN working, ZFS’s RAM requirements are high, and I’d prefer to stick with something Linux-flavoured.

A third is unRAID. You have a bunch of disks, and use the largest as a parity disk. Lose one drive and you can rebuild; lose two and you lose the data on both of them, but not everything else as well. There are some disadvantages to its high level approach (rather than at the hardware or filesystem level), but the tradeoffs suit what I want. However, it does cost money to use with more than three disks, and part of it isn’t open source which might put some off.

I don’t want to regurgitate the unRAID wiki in this post - the documentation is good when you know what you’re looking for, but I found it to be lacking in a sensible defaults and useful things to install section. That’s what I hope this is, because once you start using unRAID you’ll notice a couple immediate of problems. - The stock web UI is ugly - Shutting down requires you to run a full parity-sync if you don’t stop the array first - Adding disk to the array takes hours - Installing packages is a pain - And if you’re using a MicroServer… wake on LAN doesn’t work

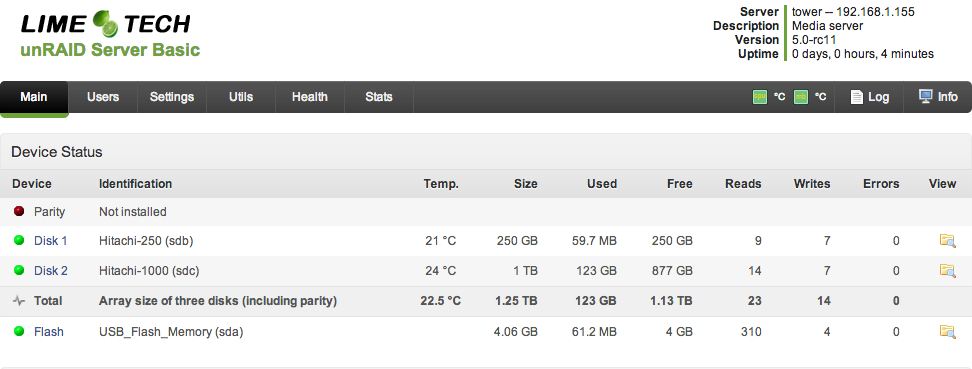
The web UI problem is pretty easy to solve with a plugin called SimpleFeatures. It changes the stock interface into this, as well as adding a handful of other features which integrate well into the web interface.

Requiring a parity check after an abrupt power off is one of the high-level implementation disadvantages I mentioned. The data disks are formatted as ReiserFS which is a journaled file system, but the parity drive is literally just an XOR of all the bits of the other drives. No filesystem, just bits. So if you just turn the power off, the parity disk may be inconsistent with the other disks and the only real solution is to scrub over all the disks and check that it’s not. Instead, you should stop the array before shutting down - luckily, there’s a nice powerdown script that does this for you.

Wake on LAN with the N40L is a pain and doesn’t work properly. The way to get it working with Linux is to take the network interface down before you switch it off, which keeps the interface listening for magic packets when the server is off. I couldn’t get it working in the 4.x releases, but the latest 5.0-rc12a release work great. Add the line /sbin/ifconfig eth0 down to the powerdown script, just before the /sbin/shutdown line.

When you add a disk to the array, it first writes zeroes to it and then formats it. If you’re adding a 2TB drive, that’s over 5 hours during which the array is inaccessible. Unacceptable! What we need is a script that does that in the background. Again, someone’s been there already and created a preclear script. It takes longer to run than the standard preparation as it does a full read, write and then reads again - I found it took around 5 hours per terabyte. It also does SMART checking before and after, so it’s a decent way to burn in new drives.

Packages. unRAID is a stripped down Slackware distro that fits into 128MB, so understandably it’s a bit light on packages. You can do it yourself, but unRAID unMenu provides a quick and dirty web interface to install common packages with unRAID customisations. Customisations? This is a live OS remember, so everything apart from /boot gets thrown away when the power goes down. For example, if you install sshd through unMenu, it also sets up a script to copy /etc/ssh/ back into place on each boot. Personally I can’t get by without SSH and Vim.

While it took a bit of tweaking to get it set up to a state I like, unRAID feels pretty solid. If you’re looking for a network storage solution that just uses a computer rather than a dedicated device, it’s worth a look.

Keyboard shortcuts in Windows & OS X
26 Jun 2012

I use OS X at home and Windows at work. I’m happy switching between the two, but one big difference that always gets me is keyboard shortcuts.

In Windows, the key you hit with your shortcuts is ctrl, (usually) found in the leftmost, bottommost corner of a keyboard. In OS X though, you’ve got the cmd key - just to the left of the space bar. Getting used to one or the other is not a problem, but using both every day always finds me wondering - briefly - why nothing’s happening. Oh right, not that key, the other one.

Help in an unlikely place

If you’re reading this, you probably hate the Caps Lock key.

It’s big, it’s taking up prime keyboard real-estate, and its functionality is annoying - both when you hit it accidentally, and when you watch someone use it as a Shift key. So let’s make it work for us by turning it into a giant shortcut key, one that’s already under your little finger when you’re on the home row. Perhaps best of all, it’s in exactly the same place, no matter the OS.

Making this change on a Mac is dead easy: hit up System Preferences -> Keyboard -> Modifier Keys, and then remap Caps Lock to cmd.

Under Windows, remapping Caps Lock to ctrl is not quite so straightforward. I used SharpKeys which modifies the registry to remap keys (also useful for remapping media keys if they’re not detected by Windows coughAppleKeyboardcough).

Over-tweaking

I’ve found that this remapping becomes natural very quickly, so much so that I find myself trying to use it on other computers and ending up disappointed. I think this is the reason you should try and avoid too many tweaks like this: it adds one more thing you have to think about when you’re using another computer, one more setting you have to change. In this case though, I definitely think it’s worth it.

As a final bonus, it’s also far more comfortable than using ctrl or cmd if you’re hitting those shortcuts all day - Caps Lock is simply in a more natural position. No hand contortion here.

Maybe you're not such a bad guy after all, Caps Lock.

Archive